
To record a window on Mac, open TinyRecorder, click Window in the toolbar, click the window you want (or several), and click Start. Only the windows you picked end up in the video; your desktop, notifications and other apps stay out. To record every window of one app instead, use Application.
TinyRecorder is a free, open-source screen recorder for macOS 12.3 or later. It has no watermark, no time limit and no account.
Why record a single window
A full-screen recording shows everything: the Dock, the menu bar, a chat that pops up, files on your desktop. When you record only one application window, the video stays on topic and you don’t have to crop it later. It also helps on large or multiple displays, where a full-screen video would be mostly empty space.
macOS has a built-in option too. On macOS Tahoe 26 and later, the Screenshot toolbar (press ⇧⌘5) has Record Selected Window, which records one window you click. On earlier versions of macOS the toolbar can only record the entire screen or a selected portion. TinyRecorder adds a few things on top: several windows in one video, a whole app at once, app audio, and a choice of background. See QuickTime vs TinyRecorder for a full comparison of the built-in tools.
How to record a window on Mac with TinyRecorder
- Open TinyRecorder. The recording toolbar appears.
- Click Window.

- The window picker shows a thumbnail of each open window, with the app icon and window title. Click a window to select it. A green check mark shows that it’s selected.
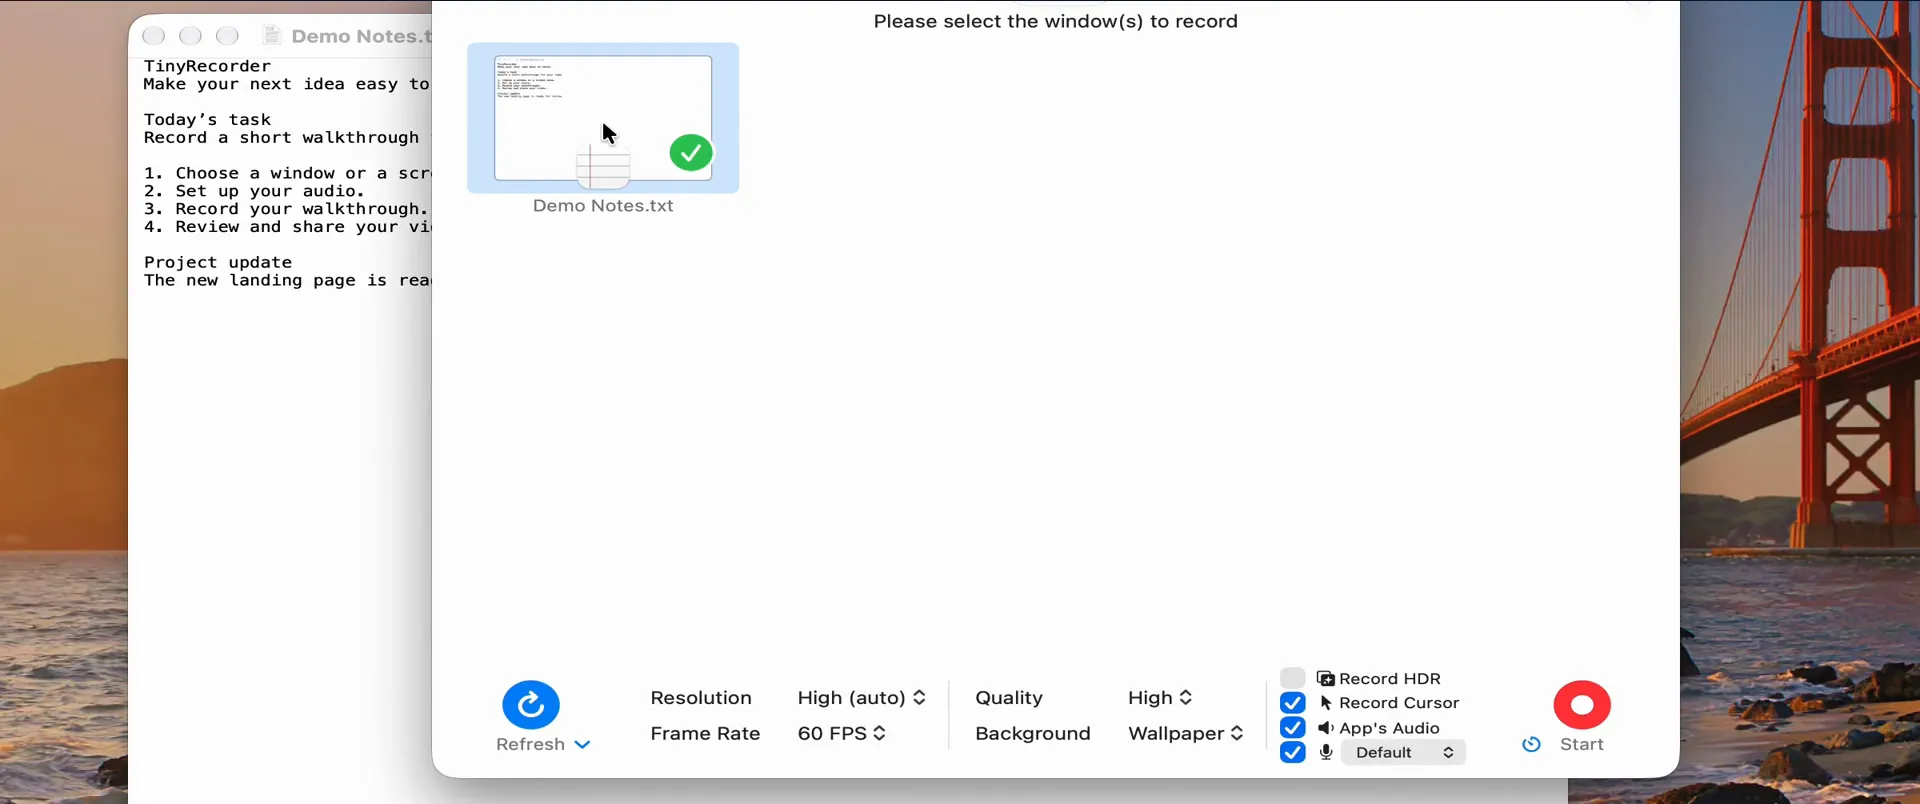
- Check the options in the bar at the bottom: Resolution, Frame Rate, Quality, Background, Record Cursor, App’s Audio and the microphone checkbox.
- Click Start. If you set a delay in Settings › Recorder › Delay Before Recording, a countdown runs first.
- To stop, click the TinyRecorder icon in the menu bar, or press your Stop Recording shortcut.
If you’d rather point at the window on screen than find it in a list, click Select Window Directly (the window icon at the top of the picker). Move the pointer over the window you want, click it, then click Start. Press Esc to cancel.
Can’t find the window?
- Click Refresh if you opened the window after the picker appeared.
- The picker hides windows without a title. Click the small arrow next to Refresh and turn on Show Windows with No Title.
- On a Mac with more than one display, each display has its own tab. Pick the tab of the display the window is on.
- If you have many windows open, Don’t Create Thumbnails (same menu) makes the picker open faster.
Record multiple windows on Mac
To record several windows in one video, click each one in the picker. Each selected window gets a check mark; click it again to deselect it. All windows must be on the same display, because switching to another display’s tab clears the selection.
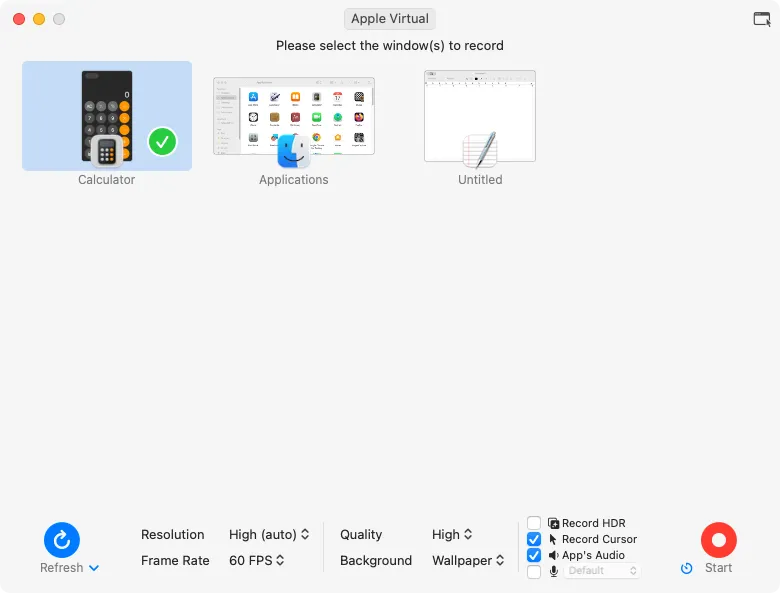
There is one difference to keep in mind:
- One window: the video is cropped to that window, so its size matches the window.
- Several windows: the video is the size of the whole display. The selected windows appear where they are on screen, and everything else is replaced by the background you chose.
Record all windows of one app
Click Application in the toolbar to record every window of an app, including windows it opens during the recording. Select one or more apps in the list and click Start. As with several windows, the video covers the whole display and shows only the apps you selected.
Application mode also helps with sound. With App’s Audio on, TinyRecorder records the sound of the selected app, and it includes the app’s helper processes, which is where browsers and many meeting apps actually play their audio. System audio recording needs macOS 13 or later. For more on sound, see how to screen record on Mac with internal audio.
What happens when the window is covered or moved
When you record a single window, TinyRecorder captures the window itself, not a rectangle of the screen. You can move the window during the recording, and other windows that pass in front of it don’t appear in the video.
When you record several windows or an app, the video shows the whole display, but only the windows you picked are drawn. Other apps don’t appear even when they overlap, and a window you move shows up in its new position.
If you want a fixed rectangle of the screen instead, use Screen Area. Its Window Area button sets the area to the size and position of a window you click, but the area stays where it is if the window moves. See how to record part of your screen on Mac.
Choose a background
The Background menu in the bar decides what fills the space around your windows:
- Wallpaper (default): your desktop wallpaper.
- Black, White, Gray and several other colors.
- Custom: the color you set in Settings › Recorder › Custom Background Color.
- Transparent: appears after you turn on Settings › Output › Recording with Alpha Channel. TinyRecorder then saves H.265 in a MOV file with an alpha channel, which you can place over other footage in a video editor.
The background matters most with several windows or an app, where the video covers the full display. With a single window the video is cropped to the window, so there is little background to see.
Record the topmost window with a keyboard shortcut
For quick recordings, assign a shortcut to Record Topmost Window in Settings › Hotkey. The shortcut has no default key, so you choose one. When you press it, TinyRecorder starts recording the front window of the app you’re using right away, without opening the picker. Recordings started this way don’t include the mouse pointer. Press the same shortcut again to stop.
You can also start recordings from scripts. See automation.
If something doesn’t work
- The picker is empty or shows only gray thumbnails. TinyRecorder needs the Screen Recording permission. Turn it on in System Settings › Privacy & Security › Screen Recording. If the toggle is on but recording still fails, use Settings › General › Screen Recording Permission › Repair….
- No sound. Make sure App’s Audio is checked. For your voice, check the microphone box and pick the right device.
- The cursor highlight is missing. Settings › Recorder › Highlight the Mouse Cursor doesn’t work for single-window recordings. Record several windows or a screen area if you need it.
- “The selected window is no longer available.” The window closed before the recording started. Click Refresh and select it again.
More answers are in the FAQ.
Next steps
Download TinyRecorder and record your first window. It’s free and open source; the code is on GitHub. To record a fixed region instead, read how to record part of your screen on Mac.