
To record part of your screen on Mac, open TinyRecorder, click Screen Area, drag a rectangle over the region you want, and click Start. You can move and resize the area with its handles or type an exact size. TinyRecorder also records system audio and your microphone, with no extra audio driver.
TinyRecorder is a free, open-source screen recorder for macOS 12.3 or later, with no watermark and no time limit.
The built-in option: Record Selected Portion
macOS can record a selected area on its own. Press ⇧⌘5 to open the Screenshot toolbar, choose Record Selected Portion, drag the borders of the selection, and click Record. It’s quick and needs no extra app. Under Options you can pick a microphone, show mouse clicks, set a timer and choose where to save.
What it lacks is system audio on most Macs: Apple’s support article lists an Include System Audio option only in macOS 27 or later. On earlier versions you need a virtual audio driver such as BlackHole to record what your apps play. It also has no way to type an exact size, change the frame rate, or hide desktop files. If you need any of that, use a selected area screen recorder like TinyRecorder. For a full comparison, see QuickTime vs TinyRecorder.
How to record part of screen on Mac with TinyRecorder
- Open TinyRecorder and click Screen Area in the toolbar.

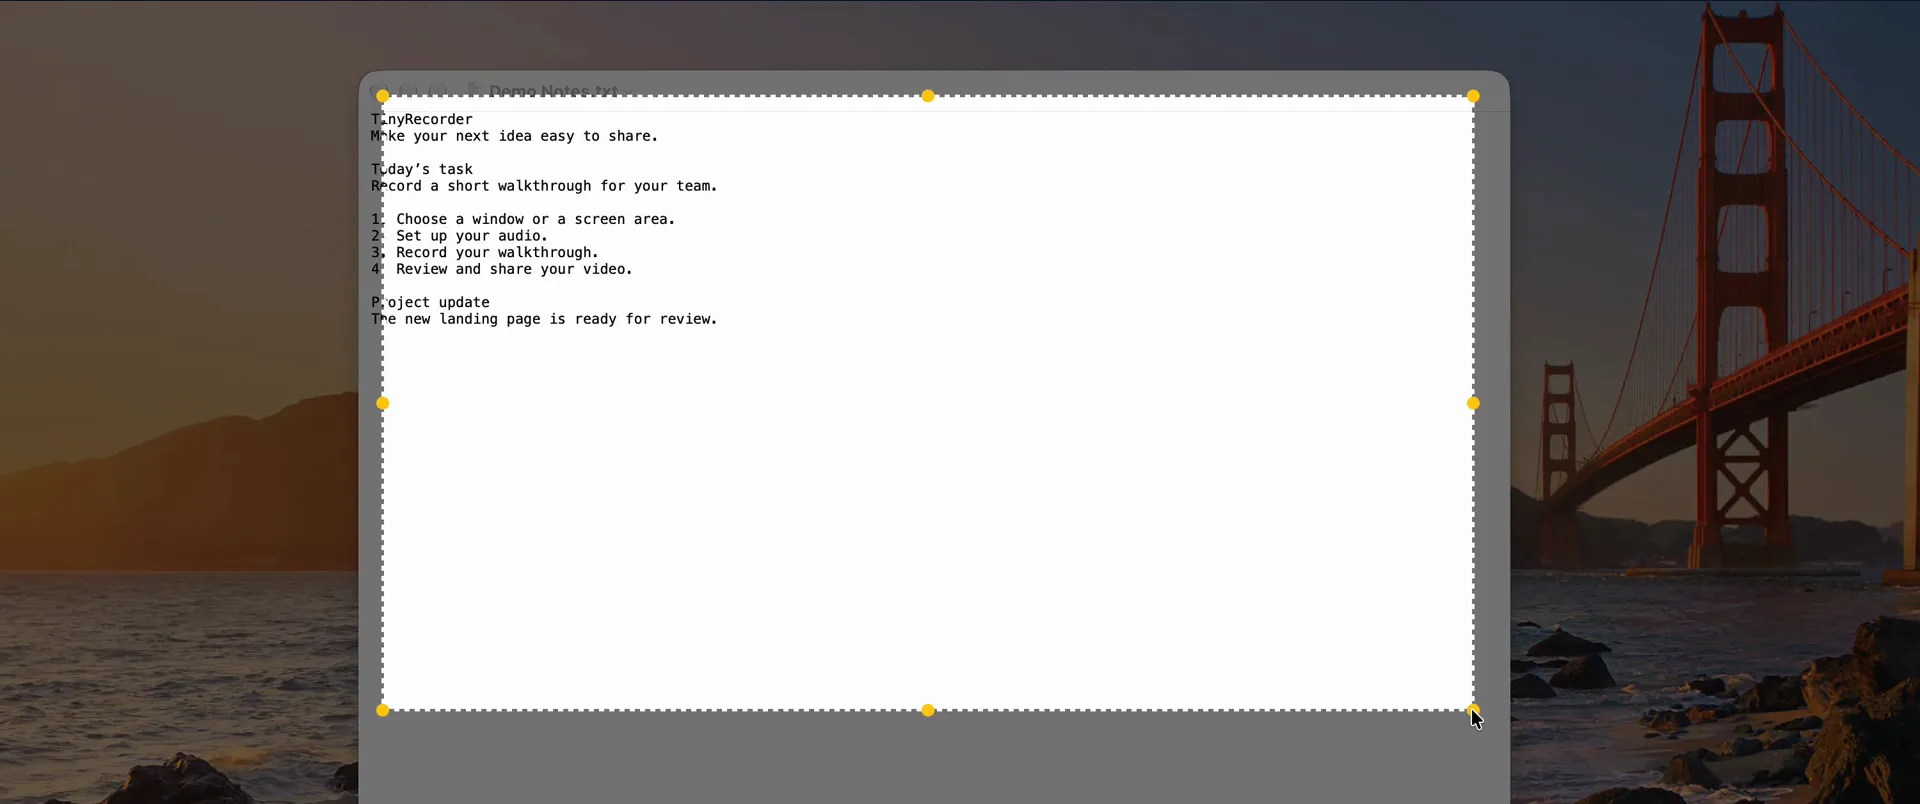
- The screen dims and a rectangle appears. The first time it’s 600 × 450 points; after that, TinyRecorder remembers the last area you recorded on each display.
- Drag anywhere outside the rectangle to draw a new one. Drag inside it to move it.
- Drag the yellow handles on the corners and edges to resize it.
- In the panel at the bottom of the screen, check the recording options: Resolution, Frame Rate, Quality, Background, Record Cursor, App’s Audio and the microphone.
- Click Start. To stop, click the TinyRecorder icon in the menu bar or press your Stop Recording shortcut.
Press Esc, or click the small x on the panel, to cancel without recording.
The area always stays within one display. On a Mac with several displays, move the pointer to the other display and the selector moves with it.
Set an exact size and position
Click Resize in the panel to type numbers instead of dragging:
- Position: X and Y of the top-left corner, in points from the top-left of the screen.
- Area Size: width and height in points.
- Output Size: the pixel size of the video you’ll get.
With Resolution set to High (auto), a Retina display records at twice the point size, so a 1280 × 720 area gives a 2560 × 1440 video. Choose Normal (1x) to get 1280 × 720.
Match the area to a window
Click Window Area, then click a window. The area snaps to that window’s size and position. This is a fixed custom area: if the window moves, the area doesn’t follow. To follow a window wherever it goes, record it in Window mode instead; see how to record a window on Mac.
Start with a keyboard shortcut
In Settings › Hotkey, assign a key to Select Area to Record. It has no default, so pick a combination you don’t use elsewhere. Pressing it opens the area selector on the display under the pointer, ready to adjust and start. While a recording runs, pressing the same shortcut stops it.
Record sound with the area
The options bar works the same for every mode:

- App’s Audio records what your Mac plays, captured with Apple’s ScreenCaptureKit. This needs macOS 13 or later.
- The microphone checkbox adds your voice. Pick the input in the menu next to it.
By default, the microphone and system audio are mixed into one track after you stop. You can change that in Settings › Output › Record Microphone to Main Track. More on this in how to screen record on Mac with internal audio.
Tips for clean recordings
Use the same size for a series. If you make tutorials, record every video at the same area size, for example 1280 × 720 or 1920 × 1080 in points. Type it in under Resize once. TinyRecorder remembers the last area per display, so the next recording starts from the same rectangle.
Hide desktop files. Turn on Settings › Recorder › Exclude Files on Desktop. Icons on your desktop disappear from the video without you having to move them.
Keep TinyRecorder out of the video. Turn on Settings › Recorder › Exclude TinyRecorder itself so its own windows don’t show up in your recording.
Hide other apps. Add apps to the Blocklist in Settings. Their windows are left out of Screen and Screen Area recordings. An app you launch after the recording starts can’t be excluded, so open it first.
Tidy the menu bar. If your area includes the menu bar, Settings › Recorder › Hide Control Center Icons removes the clock, Wi-Fi, volume and other system icons from the video.
Replace the wallpaper. Set Background to a color instead of Wallpaper, and the desktop picture is replaced with that color in the recording.
Check the frame rate. 60 FPS suits most screen tutorials. Higher rates are available up to 240 FPS, but the actual rate depends on your Mac and on what’s on screen.
If something doesn’t work
- Nothing happens when you click Start, or the video is black. Check System Settings › Privacy & Security › Screen Recording and make sure TinyRecorder is on. If it is and recording still fails, use Settings › General › Screen Recording Permission › Repair….
- No system sound. Make sure App’s Audio is checked and that you’re on macOS 13 or later.
- No voice. Check the microphone box, pick the right device, and allow microphone access when macOS asks.
- The area won’t extend onto my second display. An area always belongs to one display. Use Screen to record a whole display, or record each display separately.
More answers are in the FAQ.
Next steps
Download TinyRecorder and record your first custom area. It’s free and open source, with the code on GitHub. To record a window that moves around, read how to record a window on Mac.